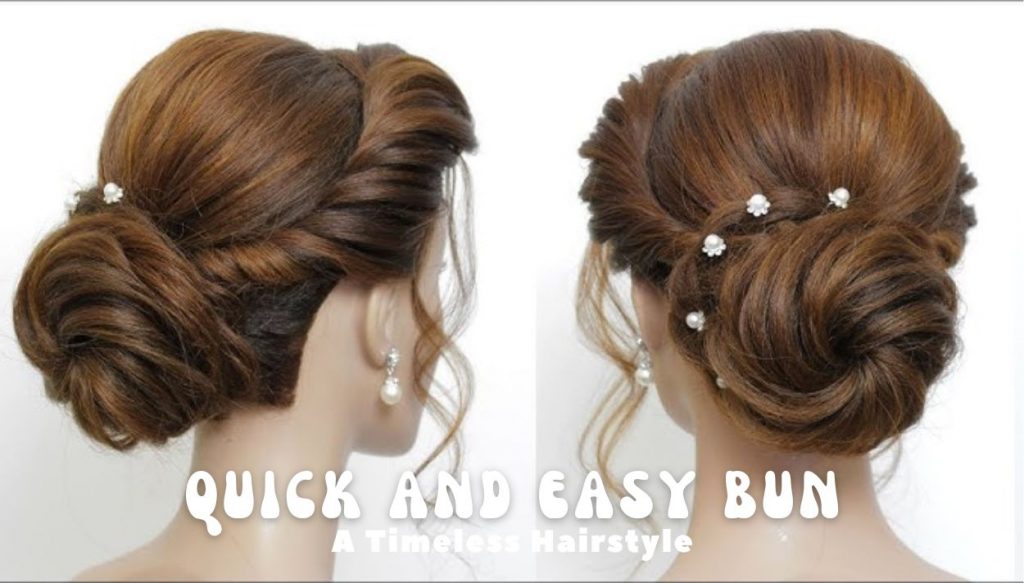
The bun, a hairstyle with a rich history and enduring popularity, remains a go-to choice for individuals seeking a blend of practicality, elegance, and effortless style. From its practical origins of keeping hair neatly contained to its modern interpretations on red carpets and everyday settings, the bun’s versatility is undeniable. Whether you’re rushing to work, hitting the gym, or attending a more formal event, a well-executed bun can be adapted to suit any occasion. This comprehensive guide will provide a detailed walkthrough of creating a quick and easy bun, perfect for daily wear and adaptable for more polished looks.
Essential Tools
Before embarking on your bun-making journey, gather the necessary tools:
- Hairbrush or Comb: This is crucial for prepping your hair. A brush is ideal for removing tangles from straight or wavy hair, while a wide-tooth comb is gentler on curly or textured hair, minimizing breakage. Smooth, knot-free hair provides the perfect foundation for a smooth and even bun.
- Bobby Pins: These small but mighty tools are the key to securing your bun and preventing it from unraveling. Opt for bobby pins that closely match your hair color for a more discreet hold. Consider having a variety of sizes on hand; smaller pins are great for fine hair or securing stray ends, while larger pins offer a stronger hold for thicker hair.
- Hair Elastic (or Hair Tie): This will create the initial ponytail base of your bun. Choose an elastic that is strong enough to hold your hair securely without causing damage or pulling. Seamless elastics or those without metal parts are generally recommended to prevent snagging and breakage.
Step-by-Step Instructions
- Preparation is Key: Gathering Your Hair: Begin with dry or slightly damp hair. Brushing or combing thoroughly to remove any knots or tangles is paramount. This prevents bumps and unevenness in the finished bun. Decide on the desired placement of your bun. A high ponytail at the crown of your head creates a high bun, projecting a more playful and energetic vibe. A mid-height ponytail at the back of the head offers a classic and versatile look, while a low ponytail at the nape of the neck results in a more relaxed and sophisticated style.
- Creating the Foundation: Securing the Ponytail: Once you’ve gathered your hair at the desired height, secure it tightly with your chosen hair elastic. Ensure the elastic is snug enough to prevent the ponytail from drooping or loosening throughout the day, but avoid making it excessively tight, which can cause discomfort and headaches.
- The Twist and Wrap Technique: Forming the Bun: Now comes the core of the bun-making process. Take your secured ponytail and begin twisting it along its length. The tightness of the twist will influence the final appearance of the bun; a tighter twist creates a more compact and defined bun, while a looser twist results in a softer, more relaxed bun. As you twist, begin wrapping the twisted ponytail around the base of the elastic, forming a circular shape. Continue twisting and wrapping until all of your hair is incorporated into the bun.
- Reinforcing the Structure: Securing with Bobby Pins: This is the most crucial step for ensuring your bun stays put. Strategically place bobby pins around the base of the bun, pinning sections of hair to the scalp. Aim to insert the bobby pins with the wavy side facing down for a more secure grip. Use enough bobby pins to feel confident that the bun is firmly in place; the number will vary depending on your hair’s thickness and length. Pay attention to any loose ends or stray hairs and secure them with additional bobby pins for a polished finish.
- Adding Personal Flair: Optional Finishing Touches: Once your bun is secured, you have the option to add some personal touches. A decorative hair clip or barrette can add a touch of sparkle or elegance. A stylish headband can frame the face and add a pop of color or pattern. A silk scarf tied around the base of the bun can introduce texture and visual interest. These additions can transform a simple bun into a more personalized and expressive hairstyle.
Tips and Tricks for Bun Perfection
Tackling thick hair: If you have thick hair, you might need to use more bobby pins and a stronger elastic to ensure your bun remains secure. Consider dividing the ponytail into two sections before twisting and wrapping for better control.
Achieving a polished finish: For a sleek and sophisticated bun, consider using a hair donut or bun maker. These foam inserts add volume and create a perfectly round shape, ideal for formal occasions.
Embracing texture: For a more relaxed and textured bun, try backcombing the ponytail slightly before twisting and wrapping. This adds volume and creates a messier, more effortless look.
Experimentation is key: Don’t be afraid to experiment with different techniques and variations. Try different twisting methods, different bun placements, and different accessories to discover what works best for your hair type, face shape, and personal style.
The Multifaceted Benefits of the Bun
The enduring popularity of the bun stems from its numerous advantages. Buns are an incredibly practical way to keep hair out of your face and neck, especially during physical activities, hot weather, or windy conditions. By containing the hair, buns minimize friction against clothing and other surfaces, reducing the risk of breakage, split ends, and tangles. From casual to formal, the bun’s versatility allows it to seamlessly transition between different occasions and styles. A well-executed bun can instantly elevate any look, adding a touch of sophistication and polish.
Conclusion
The quick and easy bun is more than just a hairstyle; it’s a testament to the power of simplicity and versatility. With a little practice and experimentation, you can master this timeless technique and create a variety of stunning bun styles that suit your individual needs and preferences. So, embrace the bun’s effortless charm and enjoy the confidence and convenience it brings.
